A simple walk-through with the standard commands used, along with some best practices, for setting up Cloudera’s Hadoop Infrastructure: Cloudera Manager 5.4.1 & CDH 5.4.1
Today I’ll be loading Cloudera Hadoop on a virtual six node cluster, with a separate Cloudera Manager vm, on top of vmware. All of the nodes will be running Ubuntu 14.04.2 and of course updated to the latest apt-get packages and dist-upgrades like below:
$ sudo apt-get update
$ sudo apt-get upgrade
$ sudo apt-get dist-upgrade
You may need to manually edit the IP address and hostname if this was not done on install:
$ sudo nano /etc/network/interfaces
Then edit the info to be specific for your network:
# The loopback network interface
auto lo
iface lo inet loopback

# The primary network interface
auto eth0
iface eth0 inet static
        address 10.200.2.2
        netmask 255.255.0.0
        network 10.200.0.0
        broadcast 10.200.255.255
        gateway 10.200.0.1
        # dns-* options are implemented by the resolvconf package, if installed
        dns-nameservers 208.67.222.222 208.67.220.220
Then restart networking the easy way 😉 :
$ sudo ifdown eth0 && sudo ifup eth0
Hostname attributes need to be changed in two places to stick after reboot.
1. Run the aptly named hostname command:
$ sudo hostname NEW_NAME_HERE
2. To change the name permanently, run command to edit the host files:
$ sudo nano /etc/hostname /etc/hosts
Note: The above command will allow editing the two files individually one-after-another.
3. The edit to the /etc/hostname file may already be the hostname you have chosen by running the hostname command, if it isn’t just write out the name you would like the server to have and save the file.
4. The /etc/hosts file should now look like below, where masbdevcm is the hostname of my vm and the 127 address is of course the loopback interface:
127.0.0.1       localhost
10.200.2.2      masbdevcm
Next, Cloudera recommends turning off SELinux (CentOS) and AppArmor (Ubuntu). We will also need to disable iptables if those are running. This is highly controversial but I am going ahead and doing this to make configuration easier and the fact that this cluster will never see anything but local LAN traffic after the Cloudera software is downloaded and upgrades are complete.
1. How to check AppArmor status :
$ sudo apparmor_status
[sudo] password for dave:
apparmor module is loaded.
4 profiles are loaded.
4 profiles are in enforce mode.
   /sbin/dhclient
   /usr/lib/NetworkManager/nm-dhcp-client.action
   /usr/lib/connman/scripts/dhclient-script
   /usr/sbin/tcpdump
0 profiles are in complain mode.
0 processes have profiles defined.
0 processes are in enforce mode.
0 processes are in complain mode.
0 processes are unconfined but have a profile defined.
2. Disable AppArmor and unload the kernel module by entering the following:
$ sudo /etc/init.d/apparmor stop
$ sudo update-rc.d -f apparmor remove
or
$ sudo service apparmor stop
$ sudo update-rc.d -f apparmor remove
3. Remove AppArmor software :
$ sudo apt-get remove apparmor apparmor-utils -y
4. Check status of iptables (using built in ufw ubuntu 8.04+):
$ sudo ufw status verbose; sudo iptables -L
Status: inactive
Chain INPUT (policy ACCEPT)
target     prot opt source               destination

Chain FORWARD (policy ACCEPT)
target     prot opt source               destination

Chain OUTPUT (policy ACCEPT)
target     prot opt source               destination
5. Disable iptables:
$ sudo ufw disable
Firewall stopped and disabled on system startup
Next I want to set the /etc/hosts file with all of the names of all of the servers in the cluster since I won’t have a DNS server setup:
$ sudo nano /etc/hosts
And Add entries for my worker nodes:
127.0.0.1       localhost
10.200.2.2      masbdevcm
10.200.2.3      masbdevn1
10.200.2.4      masbdevn2
10.200.2.5      masbdevn3
10.200.2.6      masbdevn4
10.200.2.7      masbdevn5
Now, disable IPv6.
1. Open /etc/sysctl.conf:
$ sudo nano /etc/sysctl.conf
2. Insert the following lines at the end:
net.ipv6.conf.all.disable_ipv6 = 1
net.ipv6.conf.default.disable_ipv6 = 1
net.ipv6.conf.lo.disable_ipv6 = 1
3. Reload sysctl:
$ sudo sysctl -p
net.ipv6.conf.all.disable_ipv6 = 1
net.ipv6.conf.default.disable_ipv6 = 1
net.ipv6.conf.lo.disable_ipv6 = 1
After that, if you run:
$ cat /proc/sys/net/ipv6/conf/all/disable_ipv6
It will report:
1
If you see 1, ipv6 has been successfully disabled.
Cloudera requires an ssh root account enabled with a password, else certificates to be distributed to each node. Again, for the sake of brevity, I will enable root ssh access with a password.
1. Setup a password for the root account.
$ sudo passwd
[sudo] password for dave:
Enter new UNIX password:
Retype new UNIX password:
passwd: password updated successfully
2. Edit /etc/ssh/sshd_config, and comment out the following line:
PermitRootLogin without-password
3. Just below it, add the following line:
PermitRootLogin yes
4. Then restart SSH:
$ sudo service ssh reload
Since all of my nodes are virtual, I’ll also install vmware tools so when I clone all of the other nodes off of this one I only have to do it once.
1. In Virtual Center, right-click guest, select guest, install vmware tools
2. Run this command to create a directory to mount the CD-ROM:
$ sudo mkdir /mnt/cdrom
3. Run this command to mount the CD-ROM:
$ sudo mount /dev/cdrom /mnt/cdrom
mount: block device /dev/sr0 is write-protected, mounting read-only
4. The file name of the VMware Tools bundle varies depending on your version of the VMware product. Run this command to find the exact name:
$ ll /mnt/cdrom/
total 62824
dr-xr-xr-x 2 root root     2048 Mar 30 19:49 ./
drwxr-xr-x 3 root root     4096 May 22 11:23 ../
-r-xr-xr-x 1 root root     1969 Mar 30 19:16 manifest.txt*
-r-xr-xr-x 1 root root     1850 Mar 30 19:14 run_upgrader.sh*
-r--r--r-- 1 root root 62924912 Mar 30 19:16 VMwareTools-9.4.12-2627939.tar.gz
-r-xr-xr-x 1 root root   693484 Mar 30 19:15 vmware-tools-upgrader-32*
-r-xr-xr-x 1 root root   702400 Mar 30 19:15 vmware-tools-upgrader-64*
5. Run this command to extract the contents of the VMware Tools bundle:
$ tar xzvf /mnt/cdrom/VMwareTools-x.x.x-xxxx.tar.gz -C /tmp/
6. Run this command to change directories into the VMware Tools distribution:
$ cd /tmp/vmware-tools-distrib/
7. Run this command to install VMware Tools:
$ sudo ./vmware-install.pl -d
Note: The -d switch assumes that you want to accept the defaults. If you do not use -d, press Return to accept each default or supply your own answers. There is an Ubuntu maintained apt-get package that some versions of vmware tools will prompt you to install. In my case I am just going to use the vmware built tools, but doing a -d above will in some cases exit the install in favor of the open-vm-tools:
$ sudo ./vmware-install.pl
open-vm-tools are available from the OS vendor and VMware recommends using
open-vm-tools. See http://kb.vmware.com/kb/2073803 for more information.
Do you still want to proceed with this legacy installer? [no] y
8. Run this command to reboot the virtual machine after the installation completes (Note you may need to Ctrl+Z the install script):
$ sudo reboot
Ok, now we are ready to clone this vm and create however many other servers we would like from it. In this case we will need to clone it five times as this original node will be the Cloudera Manager node. I’ll also be extending the five cloned vm’s hard drive to 500 GB as they will be the nodes I create my hdfs data space on. There is a great tutorial on how to use gparted’s live CD to do the partition expansion here.
$ sudo shutdown -P 0
<< Clone VMs 😉 >>
Next, go ahead and start up all five cloned VMs. I don’t need SSH access at this point as I can use the console on VMware, but you may need to start them individually so you can have SSH access over the IP address we set on the vm that we did first, to avoid any IP address conflicts. Once all VMs are up, set the IP address and hostnames of all the nodes like we did much earlier in the post.
Cloudera Manager (Cloudera Install Instructions)
Finally, we are ready to install Cloudera Manager. SSH to the Cloudera Manager VM and login as root:
$ sudo ssh root@10.200.2.2
1. Download the Cloudera Manager installer binary from Cloudera Manager Downloads to the cluster host where you want to install the Cloudera Manager Server.
Download the installer:
$ wget http://archive.cloudera.com/cm5/installer/latest/cloudera-manager-installer.bin
2. Change cloudera-manager-installer.bin to have executable permission.
$ sudo chmod u+x cloudera-manager-installer.bin
3. Run the Cloudera Manager Server installer.
$ sudo ./cloudera-manager-installer.bin
This will start the TUI installer and you should be presented with the below screen:
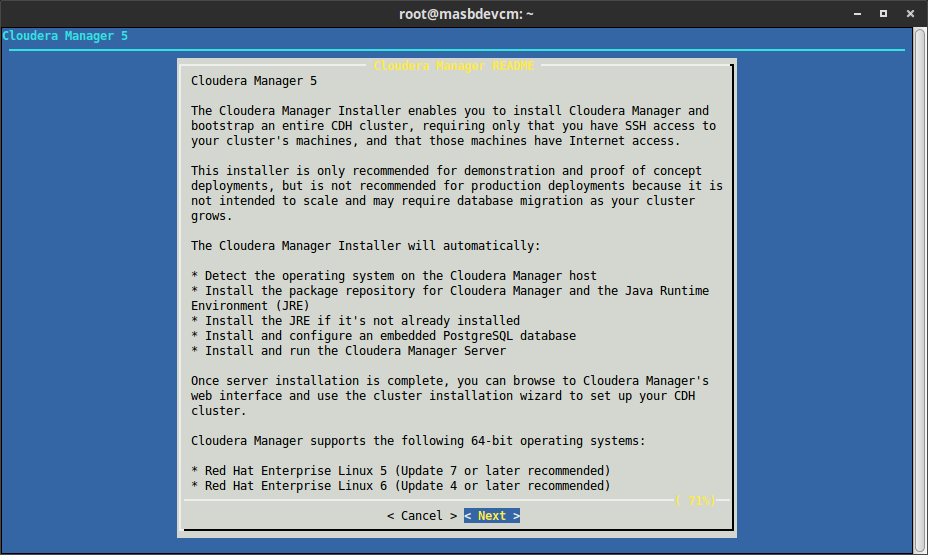
Go ahead and “Next” through the License Agreement for Cloudera and Oracle and the install will begin:
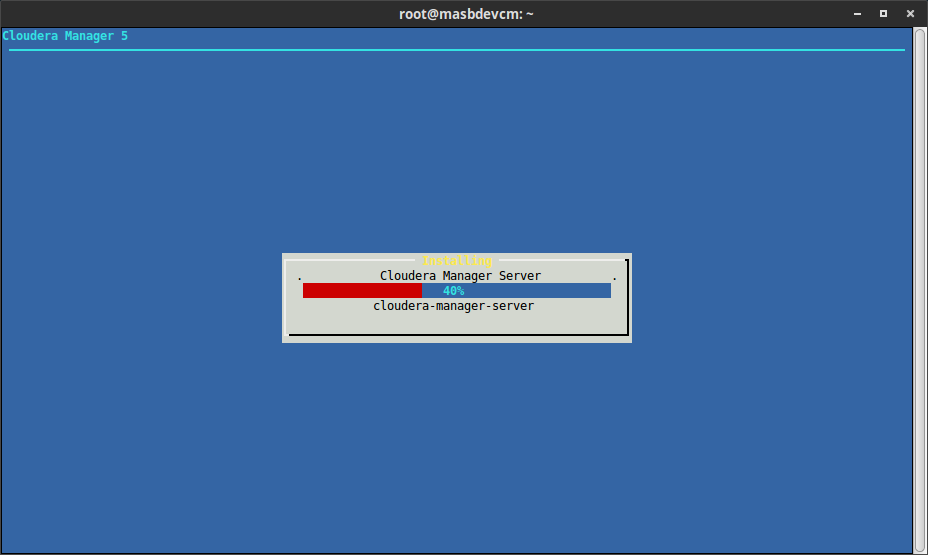
Once complete, and assuming everything installed successfully, you will be presented with the below:

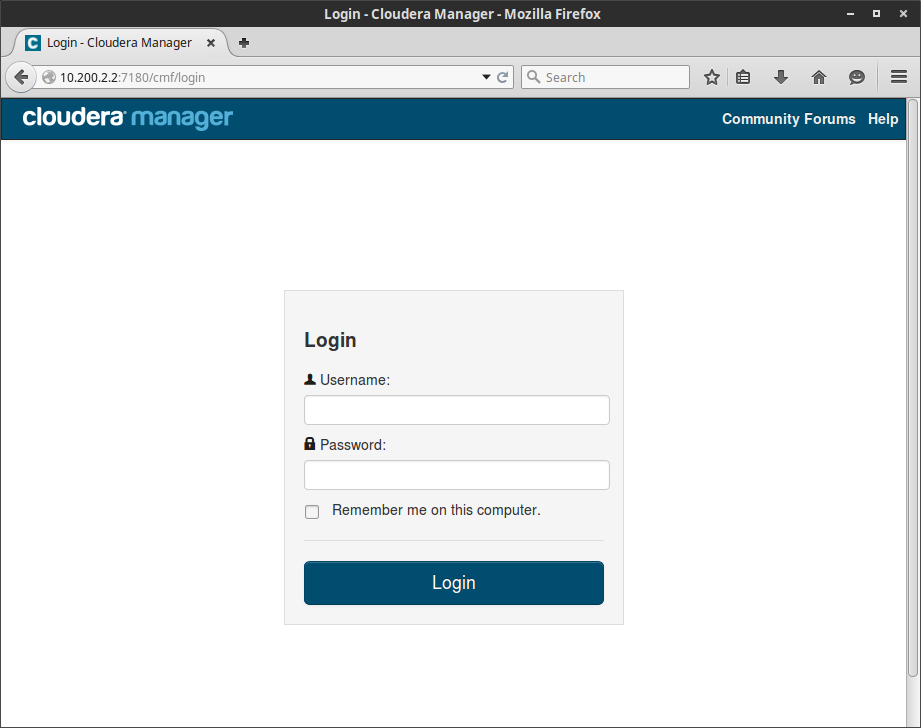
Follow the onscreen instructions to login to the web UI (In our case, replace localhost with the IP address we set earlier for the VM http://10.200.2.2:7180):
You will now be asked to select a license, make sure you have Cloudera Express highlighted in green before clicking continue:

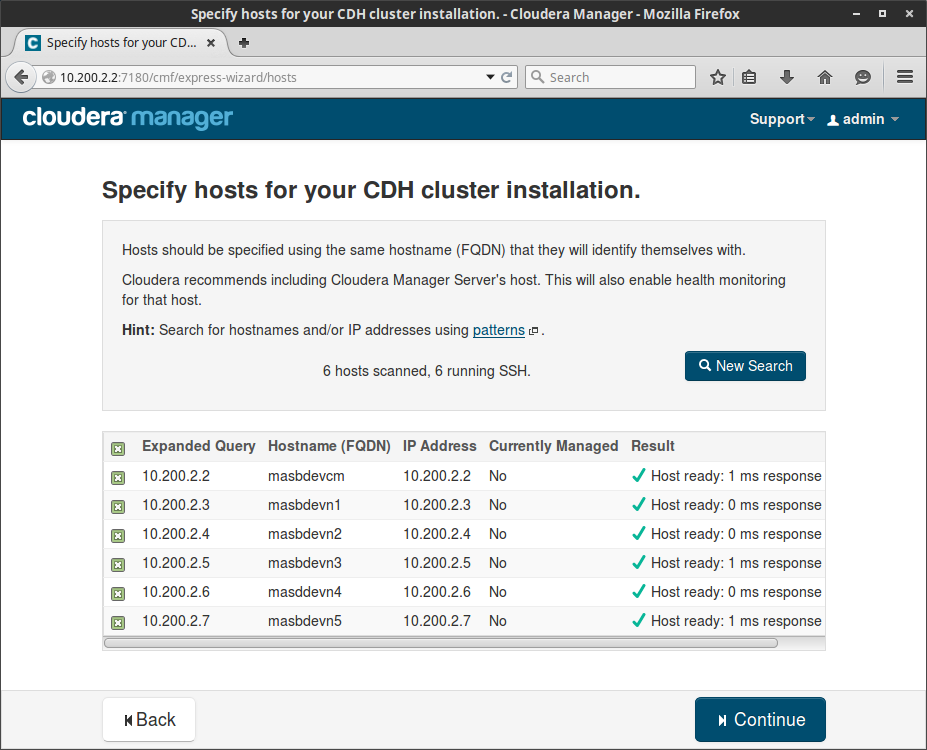
There will be another screen telling you about the Cloudera modules that express allows you to install, and then you will be taken to the next screen where we can specify our worker nodes (make sure you include the Cloudera Manager vm for health reporting):
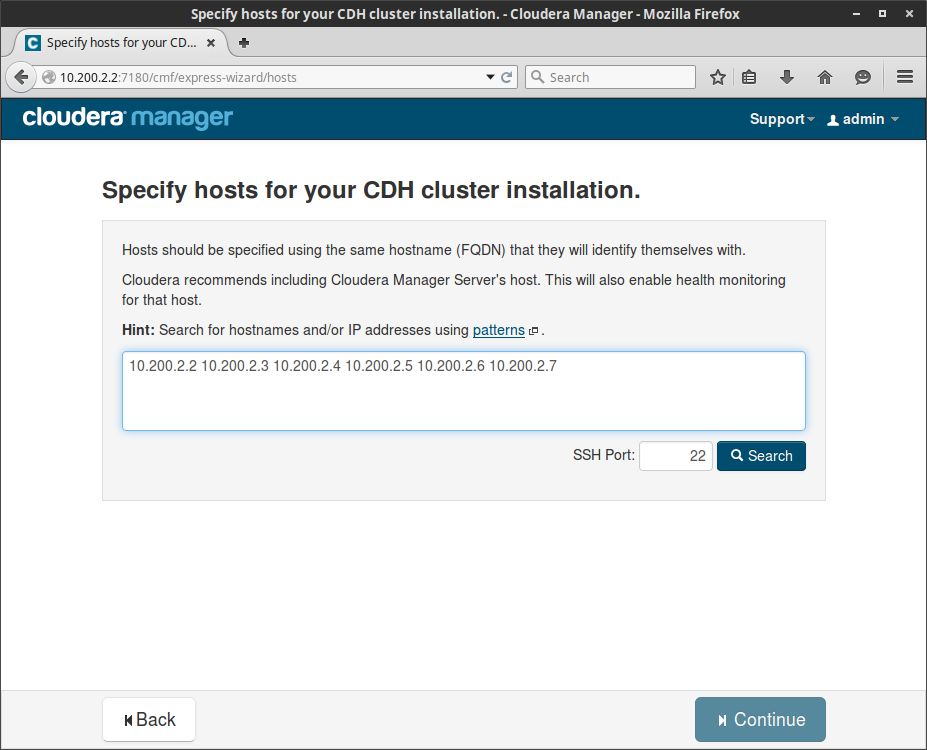
Once we specify all nodes in the cluster, click the search button to verify connectivity and then continue:
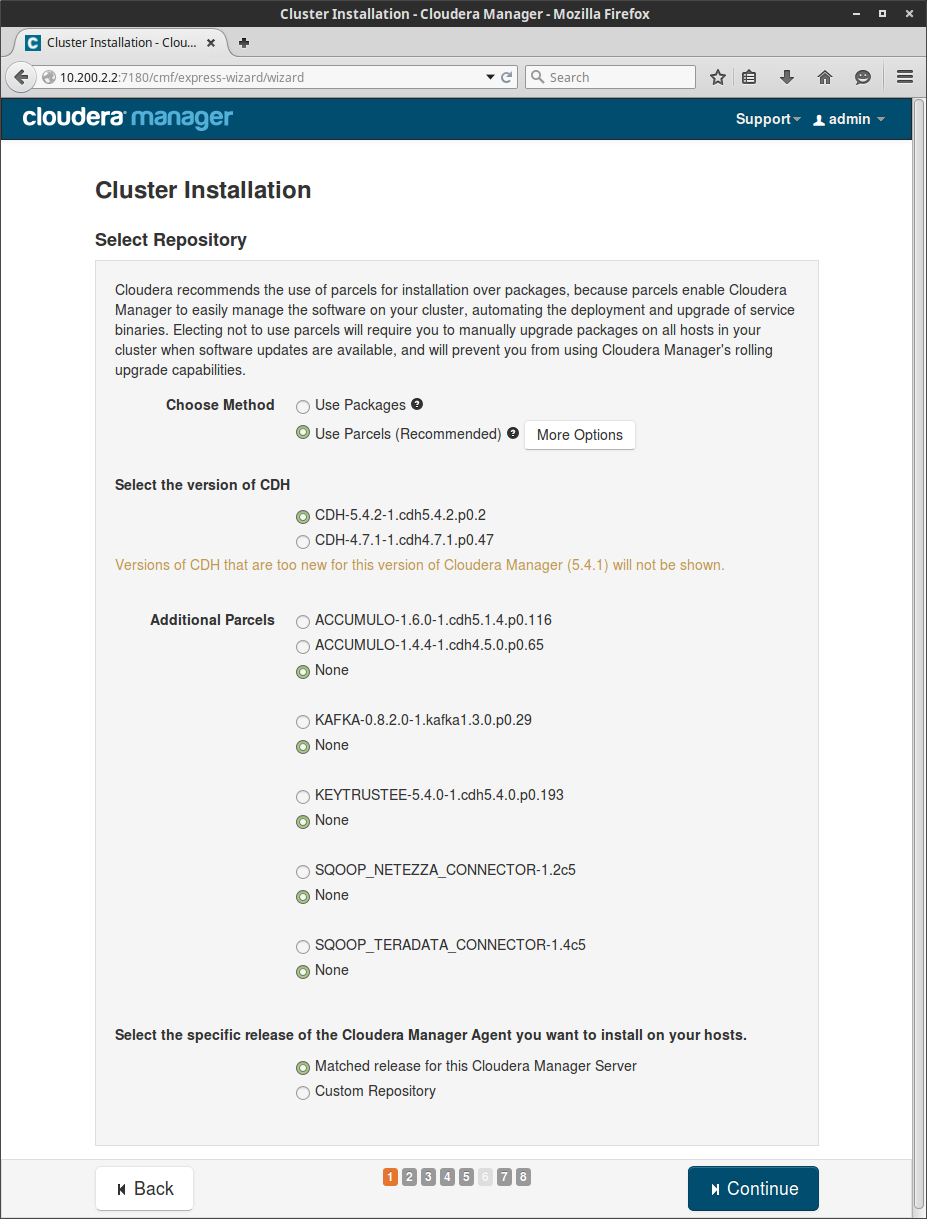
The next screen will present us with options for using Packages vs. Parcels. I’m not going to get into the difference here, but we will leave all defaults on this screen and click continue:
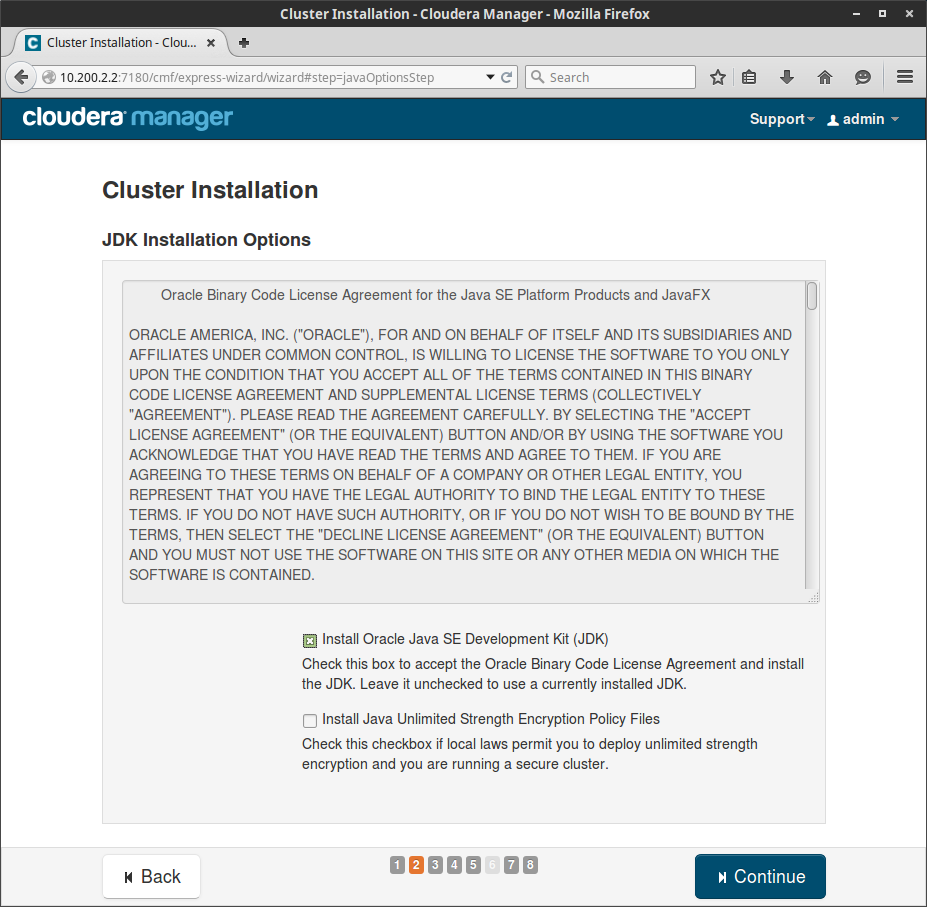
Next we will simply check the box for “Install Oracle Java SE Development Kit (JDK)” but not for the encryption policies:
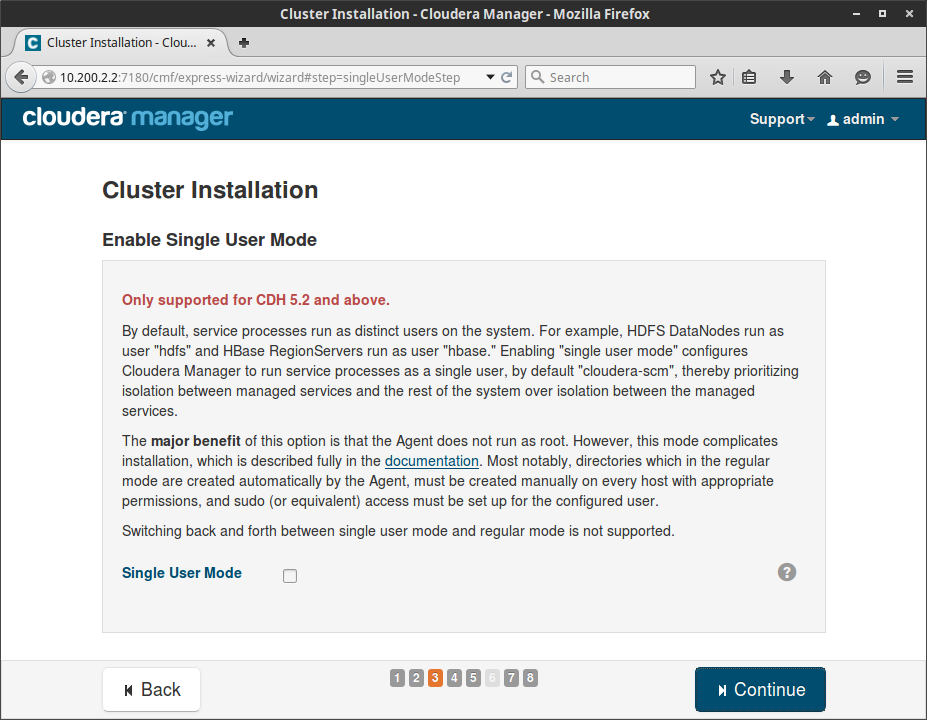
Step 3 in the wizard (highlighted by the little squares at the bottom) asks if we would like to “Enable Single User Mode”. You may want this in production as it is a security enhancement. Here I will not be using it:
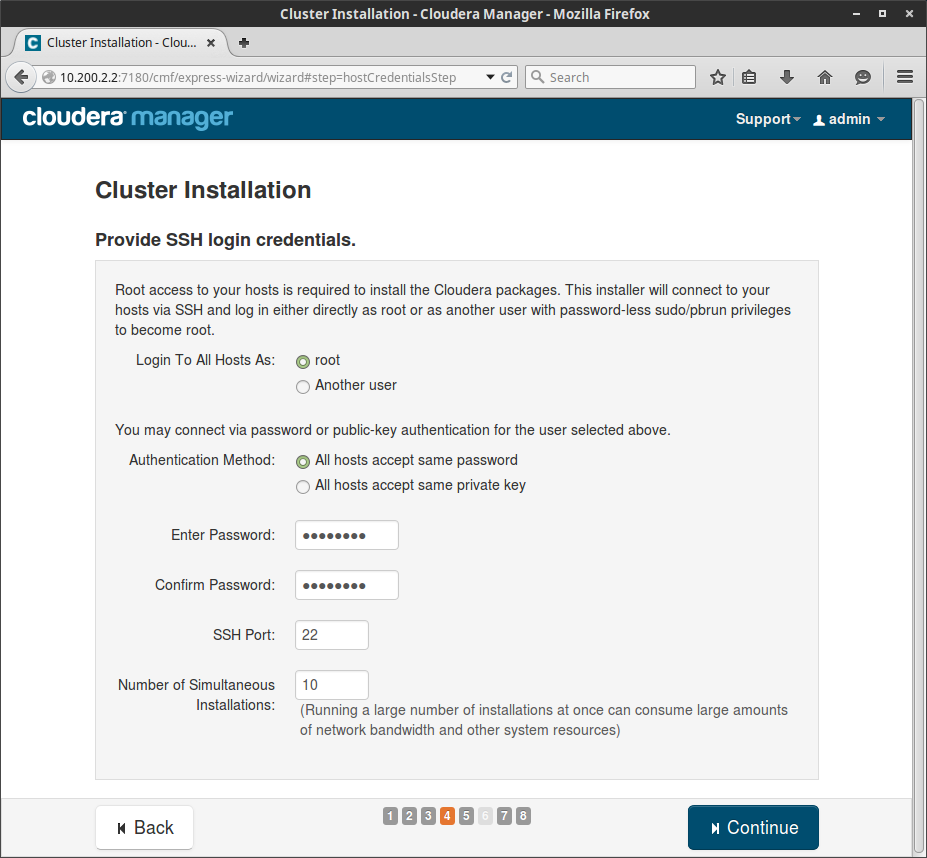
Step 4 asks us about login credentials on our VMs. We have already enabled root SSH access with a password above, so all we have to do is type our password in the two text boxes and continue:
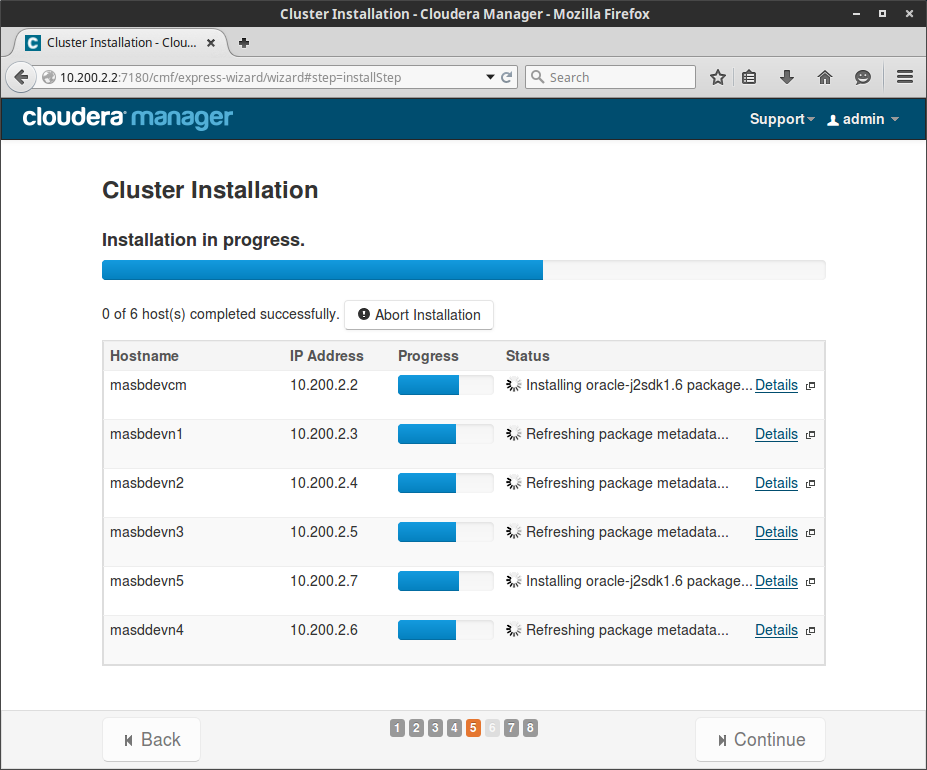
Almost Done! Step 5 will begin the installation of the java jdk and the Cloudera agent on all nodes:
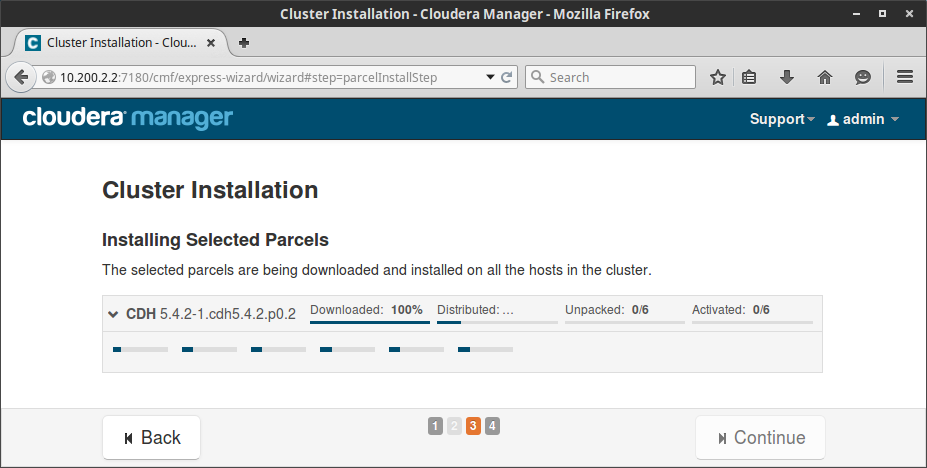
Once complete, Step 7 will skip Step 6 and will start to download, distribute, unpack, and activate the required parcels on all the VMs in the cluster (You can see a progress bar for each VM):
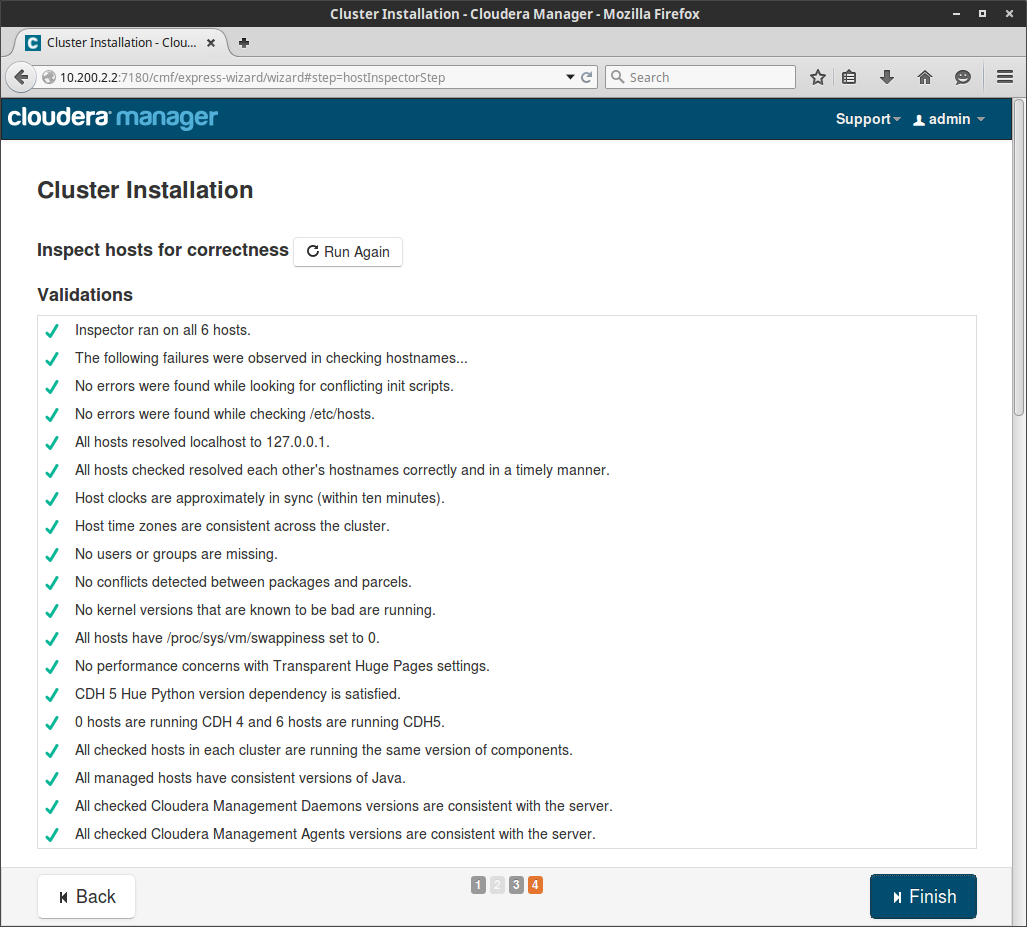
The last and final step does a health check on all nodes in the cluster. In our case all checks passed except the swappiness setting in Ubuntu Server. The error message gives the solution for the problem by setting the sysctl.conf to 10, but I prefer this setting to be set to 1 for VMs. Lets set that by logging into all the VMs as root and making the change:
$ nano /etc/sysctl.conf
Add this to the bottom of the file:
# Decrease swappiness
vm.swappiness = 1
The now 100% Host Inspector:
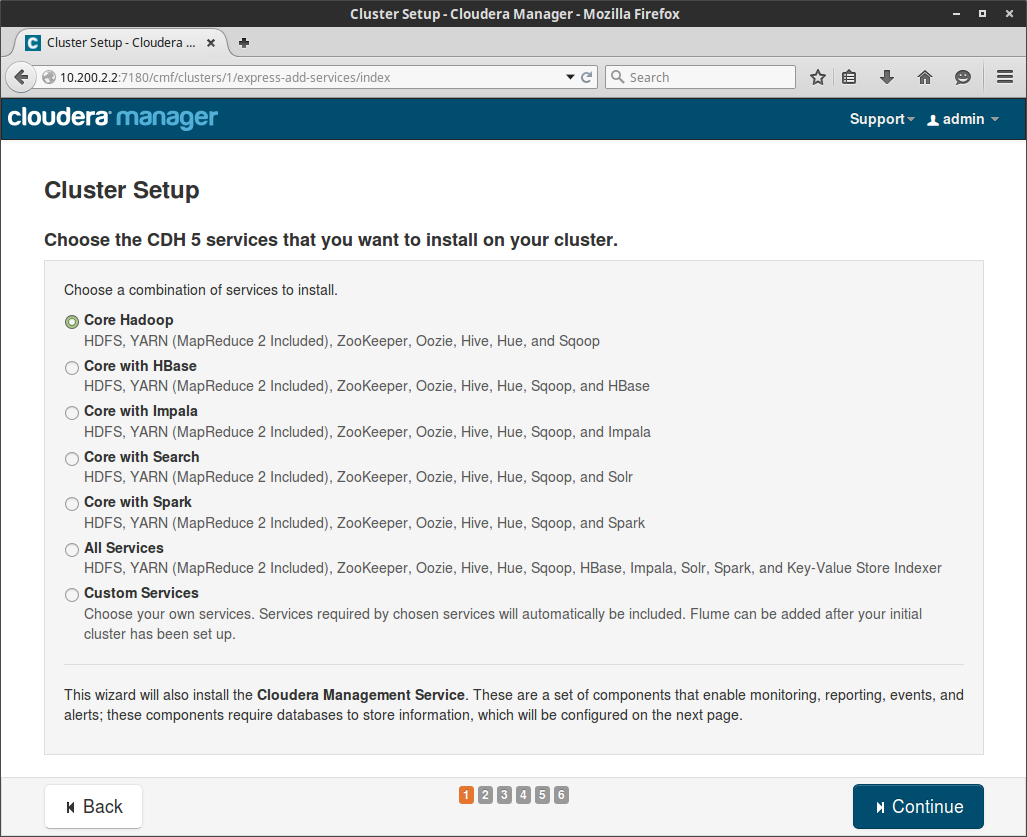
More Wizardry! Now comes the fun part, we get to choose what services we would like to install. I’m going to choose the first option as I would like to have what Cloudera considers “Core Hadoop”:
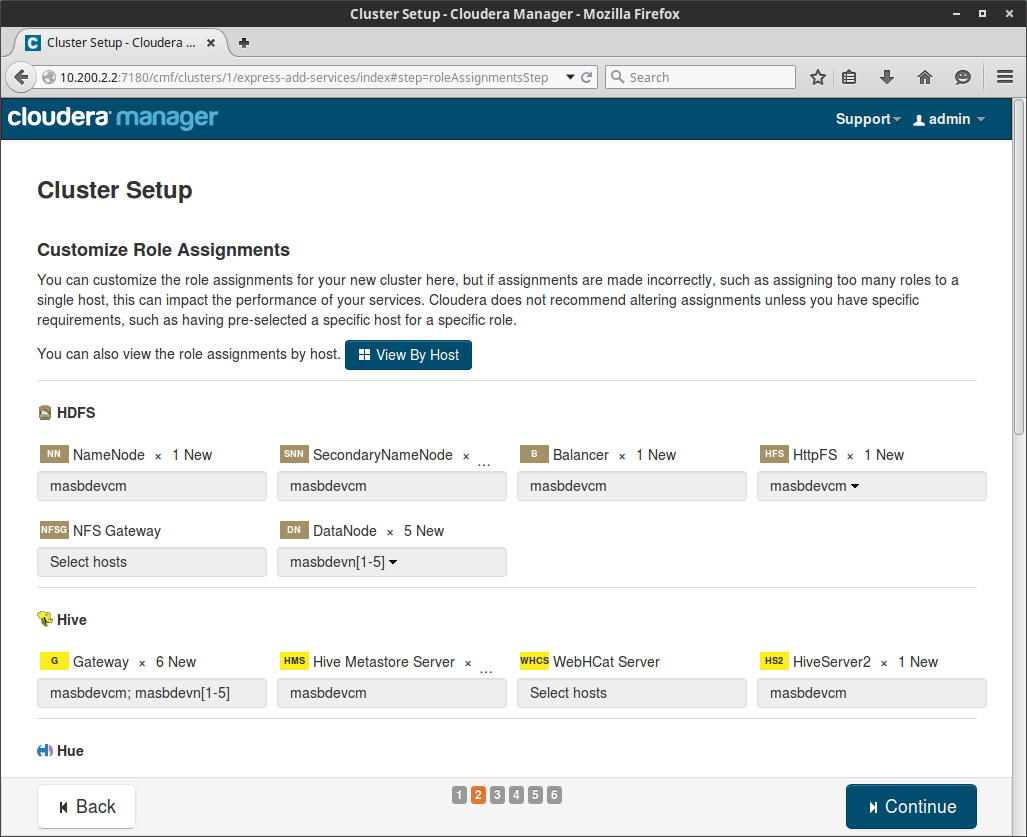
One advantage of using the really streamlined wizard in Cloudera Manager is the next screen where I can easily pick and choose the services I want to run on each node. Cloudera Manager will attempt to lay out the services in the most logical pattern for the nodes you have provisioned, and for the most part it does a pretty good job. Again, I’ll leave everything at the defaults. It’s really important here to remember to check which nodes you are selecting for data nodes. In my case, the Cloudera Manager node does not have sufficient storage like the nodes masbdevn[1-5]. It’s important to make sure that it does not get selected by the system, and in my case it didn’t. Like I said, awesome logic in the wizard:
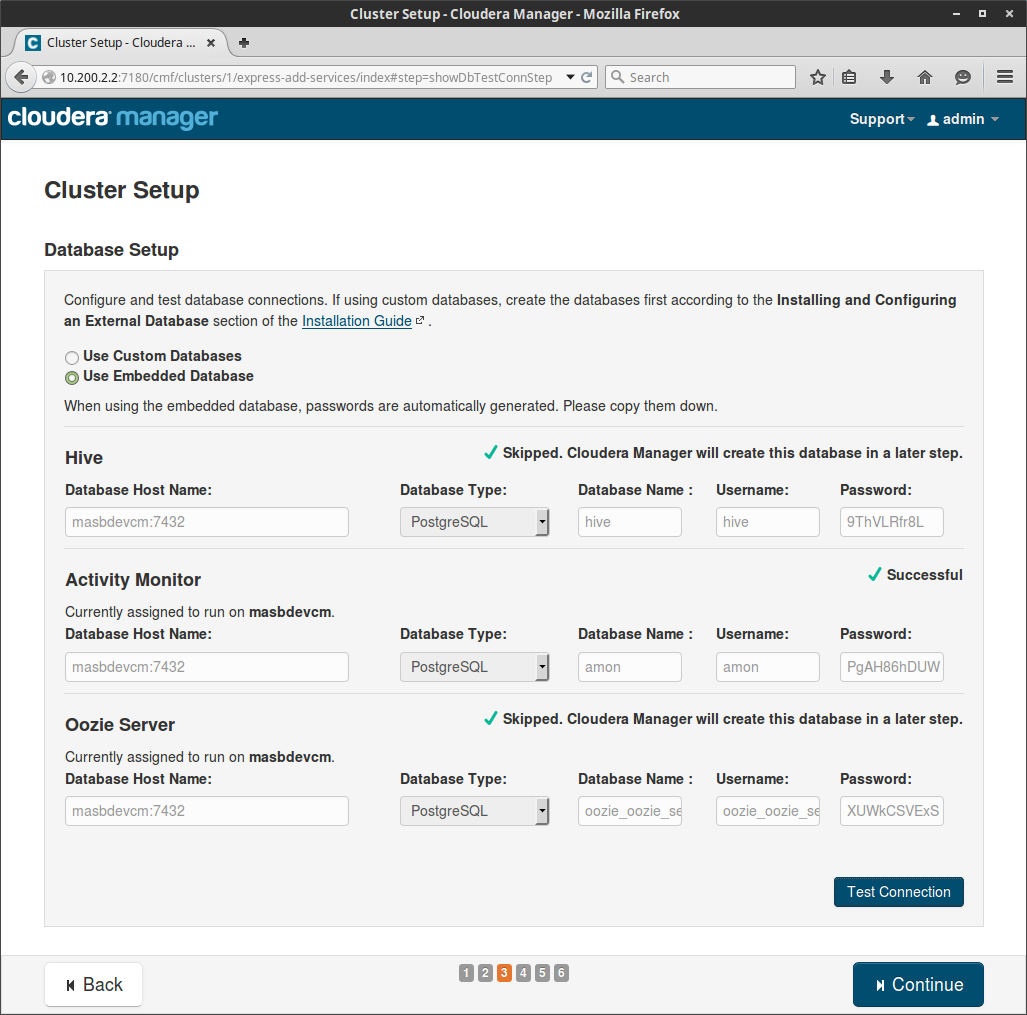
Next up is database setup. No this isn’t hdfs, this is just the PostgreSQL database the system uses for meta (And it will set it up for you 😉 ):
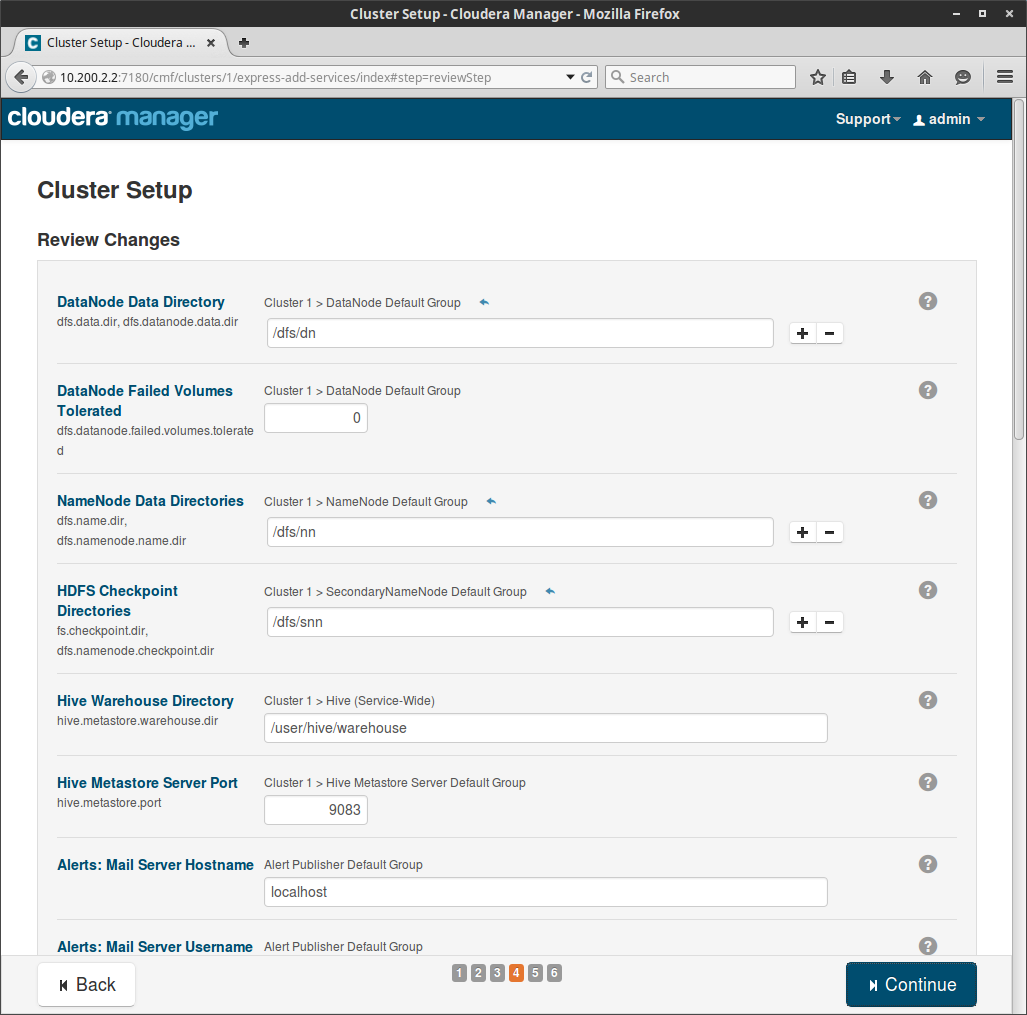
What do you know a review of changes BEFORE they will be made! Again, all defaults:
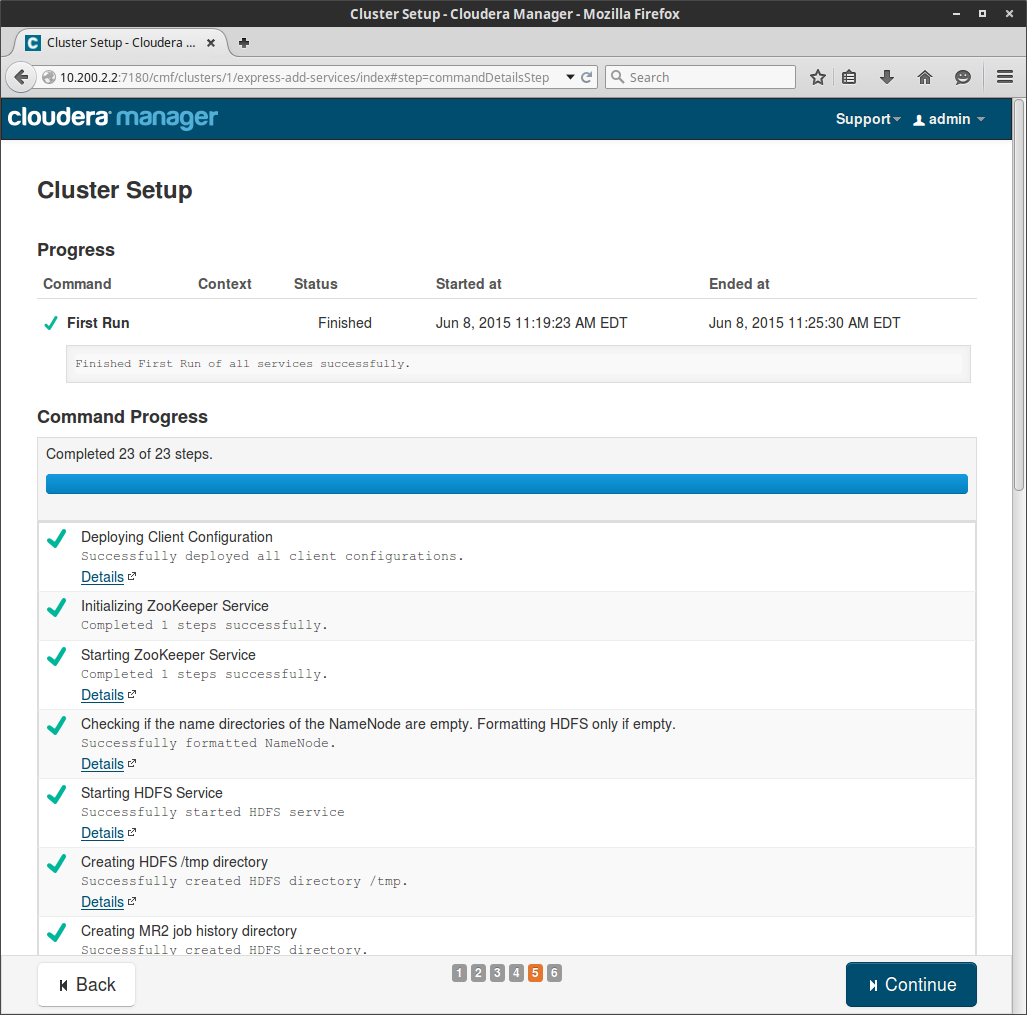
Away we go provisioning services!

All services provisioned in a little over six minutes… try to do that by hand faster 😯 :
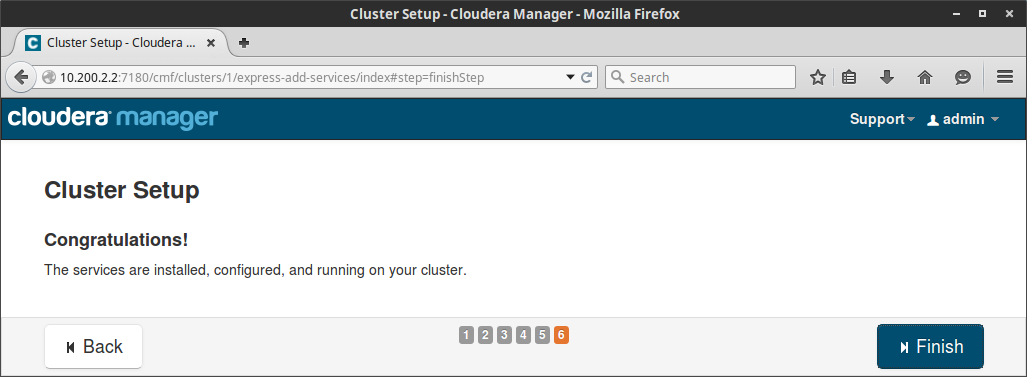
And last but not least, a sincere congrats!
When the wizard exits, it will take you to the Cloudera Manager console. This console will auto update with the latest status from all of your services:
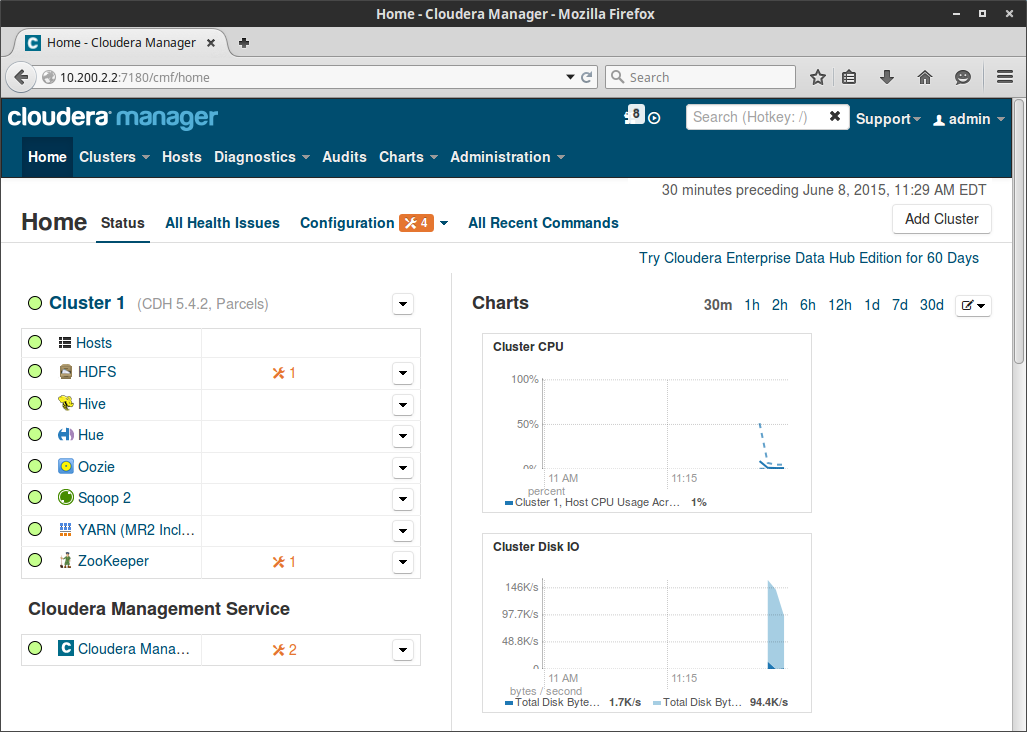
So at this point, the cluster is online and ready for work. I’ll post more articles on submitting jobs to the cluster from python soon!
To install and deploy Hadoop using this method, is the free Cloudera Express enough ? Or do you need Cloudera Enterprise to keep using clusters built using this method.