Use Case: Abiliy to boot an 13G node, either R630 or R730, when using the local RAID or HBA for a storage layer, and wanting to use an additional device for boot. With this procedure and some cheap hardware from Amazon, you can boot from a PCI device, with a U.2 or M.2 SSD or NVMe device, both consumer grade without an EFI loader, or Enterprise grade with one.
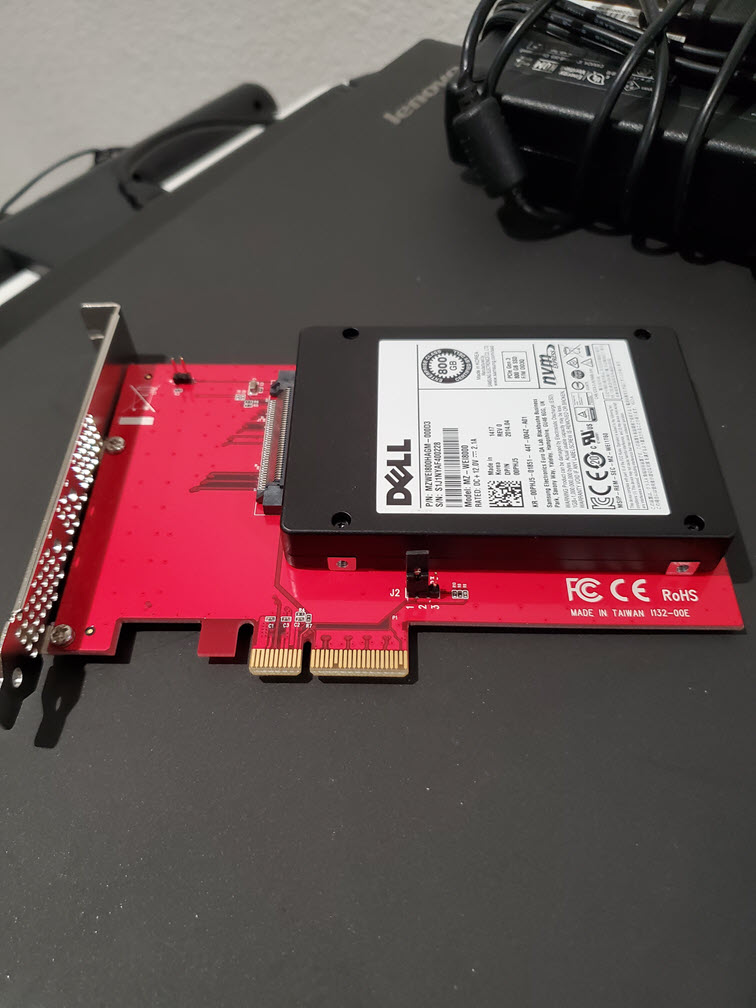
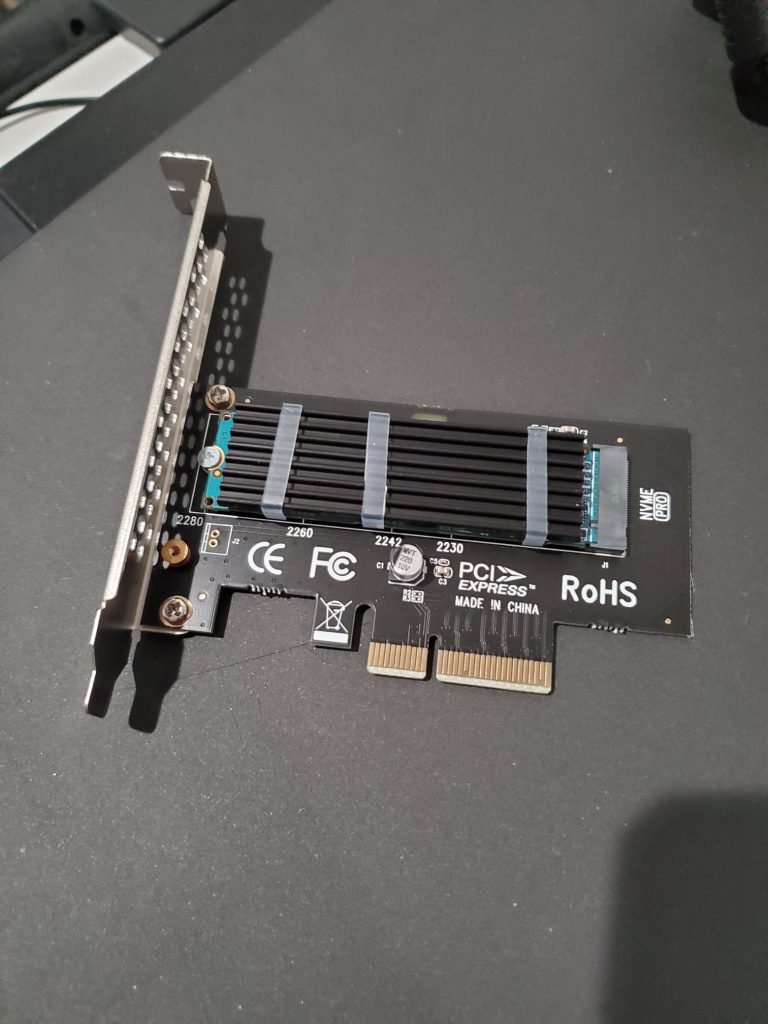
- Acquire NVMe to PCIe Card either for M2 or SSD formfactor.
- Acquire a NVMe M.2 or U.2 drive
- Acquire a 4GB or larger USB drive
Next we preform the install of the OS, for this example I will use ESXi7.0
- Install the U.2 or M.2 drive into its adapter and install it into the 13G host.
- At this point do not connect the USB device, we will use it later.
- Ensure UEFI BIOS and other BIOS settings are to your liking, we will update the boot order later
- Boot up the server and using iDRAC remote console, or a locally attached Monitor and Keyboard
- Install ESXi onto the NVMe device per normal
- Go through ESXi installer as normal
- Once install is complete reboot server. NOTE: It will not boot into ESXi on consumer grade U.2/M.2 devices, only Enterprise grade devices which have a EFI loader built onto the device, such as the image below.
- If your device is not booting, continue process
- Using the USB device and your desktop/laptop machine, for this guide I use Windows, but any OS will work
- Download Rufus
- https://rufus.ie/en/ and install
- Download Clover from GitHub Releases page, choosing the *.ISO.7z file.
- https://github.com/CloverHackyColor/CloverBootloader/releases
- I downloaded and tested Clover-5148-X64.iso.7z
- Extract the ISO file from the .7z archive using 7zip
- Launch Rufus
- In Rufus
- Select your USB drive in the top drop-down list under “Device”
- Click on the button labelled “SELECT” to the right of the “Boot Selection” heading and then find the *.ISO file you extracted in step 16 and click “open”
- Choose GPT under the “Partition Scheme” heading, and “UEFI (non CSM)” under the “Target System” heading
- Enter a Volume label of your choice, I used “BOOTUSB” for mine, but it defaults to “CLOVERCD”
- Click the button labelled START at the bottom of the window and wait a bit for it to complete.
- A pop-up will appear asking if you want to write in ISO Image Mode or ISP -> ESP mode, Select the first one “Write in ISO Image mode (Recommended)” and click OK
- Another pop-up will appear to warn that all data on the device will be destroyed. Click OK
- If another pop-up appears that you have multiple partitions, select OK to continue
- Once the status/progress bar at the bottom fills completely green/full and reads “READY” you can close Rufus by clicking “CLOSE” in the bottom right of the window
- Open Windows Explorer to this USB drive we just created
- Navigate to the following directory “$Drive\EFI\CLOVER\drivers\off” and copy “NvmExpressDxe.efi“
- Paste this file into both of the following locations
- “$Drive\EFI\CLOVER\drivers\BIOS”
- “$Drive\EFI\CLOVER\drivers\UEFI“
- Once copied to both locations, eject the USB device from your PC
- Plug this USB device into your 13G server and reboot
- After a while the server will boot from the USB drive and your will be presented with the Clover loader screen
- Once this screen is shown, either using the arrow keys, or iDRAC console, shutdown the server
- Plus the USB drive back into your desktop/laptop machine
- Navigate to the “$Drive\EFI\CLOVER\misc” folder and open up the “PreBoot” log file in NotePad++
- Ctrl + F for “NVMe” until you find the LAST entry, you should find something similar to this (Loader entry created for ‘PciRoot(0x0)\Pci(0x2,0x0)\Pci(0x0,0x0)\NVMe(0x1,5C-68-90-11-59-38-25-00)\HD(1,GPT,16F9A8BC-B144-4C9D-B0EF-311F91FB454C,0x40,0x32000)\EFI\BOOT\BOOTX64.efi’).
- Copy the GUID portion, we will need this for later (I highlighted in Bold)
- Navigate to “$Drive\EFI\CLOVER” and open “config.plist” in NotePad++
- Erase all the contents of this file and replace with the below data:
<?xml version="1.0" encoding="UTF-8"?>
<!DOCTYPE plist PUBLIC "-//Apple//DTD PLIST 1.0//EN" "http://www.apple.com/DTDs/PropertyList-1.0.dtd">
<plist version="1.0">
<dict>
  <key>Boot</key>
  <dict>
    <key>Timeout</key>
    <integer>0</integer>
    <key>DefaultVolume</key>
    <string>GUID GOES HERE</string>
  </dict>
  <key>GUI</key>
  <dict>
    <key>TextOnly</key>
    <true/>
    <key>Custom</key>
    <dict>
      <key>Entries</key>
      <array>
        <dict>
          <key>Hidden</key>
          <false/>
          <key>Volume</key>
          <string>GUID GOES HERE</string>
          <key>Disabled</key>
          <false/>
          <key>Type</key>
          <string>Linux</string>
          <key>Title</key>
          <string>ESXi</string>
        </dict>
      </array>
    </dict>
  </dict>
</dict>
</plist>- Next you need to replace the “GUID GOES HERE” with the GUID saved from the previous step
- Once complete, eject USB device from your computer, and put it back into the 13G server
- Here you have two options, either install the USB inside the server, or outside, either works, but inside is best.
- Boot up the server and enter setup
- In setup ensure the USB device is first boot priority, disabling all other devices
- Reboot server
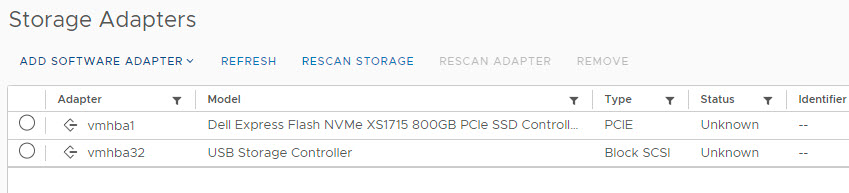
- It should boot up to your ESXi installation per normal, and ESXi will only see the U.2/M.2 device as the boot device and local datastore.